 English
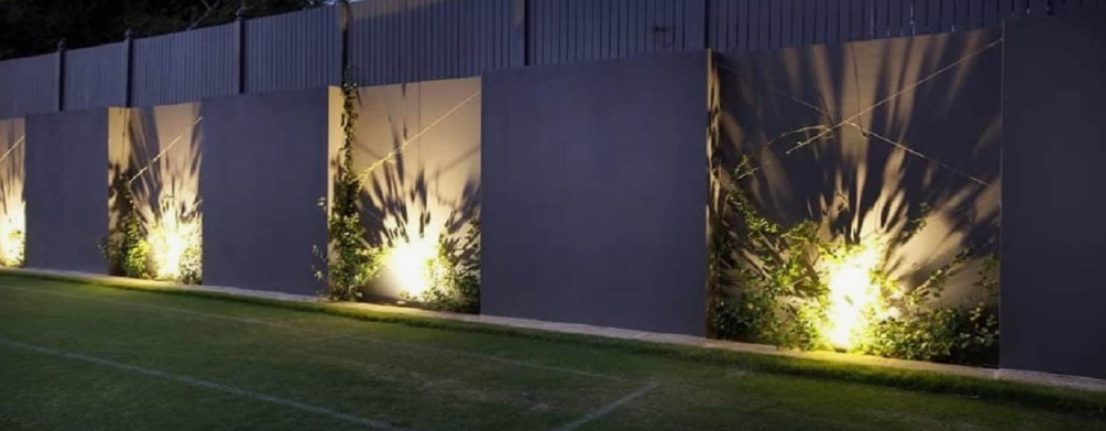
LED outdoor wall lights have become a common outdoor lighting choice for modern homes and commercial spaces due to their high energy efficiency, long lifespan, and aesthetic design. However, proper installation and maintenance are crucial to ensure optimal performance and extend their lifespan.
1. Installation Guide for LED Outdoor Wall Lights
(1) Preparation
Before installing the LED outdoor wall light, you need to confirm the following:
Choose a suitable location: Select the installation location based on lighting needs and decorative effects. LED outdoor wall lights are usually suitable for installation near doorways, garden walls, balconies, or garage doors.
Check the power supply: Ensure that the power supply matches the voltage and wattage of the selected wall light. Most LED fixtures use low-voltage power, but you need to confirm the power supply specifications.
Tools and materials: You will usually need a screwdriver, electric drill, spirit level, cables, wire connectors, waterproof sealant, and other tools and materials.
(2) Installation Steps
Mark the installation location: Use a spirit level to measure and mark the installation location of the wall light, ensuring that the height of the fixture is appropriate and the light is evenly distributed.
Install the base: Most LED outdoor wall lights have a base or mounting bracket. Use an electric drill and screws to fix the base to the wall. Ensure that the screws are secure to prevent the fixture from falling off.
Connect the power wires: Connect the power wires to the terminals of the fixture. Most LED outdoor wall lights use screw terminals or plug-in connectors. Ensure the power is turned off during this process to prevent electric shock.
Install the fixture: Install the main body of the fixture onto the base. The fixture is usually secured with clips or screws. At this point, ensure that the fixture is securely installed to prevent loosening due to vibration later.
Check for waterproofing: LED outdoor wall lights are usually waterproof, but waterproof sealant should be used at the wiring and connection points to ensure durability in harsh weather conditions.
Power-on test: After installation, power on the light to test if it works properly. If the light turns on, the installation is successful. If it doesn't light up, check if the wiring is correct or if the power supply is working properly.
2. Maintenance Guide for LED Outdoor Wall Lights
Although LED outdoor wall lights are more durable and require less maintenance than traditional lighting fixtures, regular cleaning and maintenance are still necessary to maintain their optimal lighting performance.
(1) Regular Cleaning
LED outdoor wall lights are affected by the outdoor environment and are prone to accumulating dust, dirt, and water stains. Regular cleaning not only maintains the appearance of the fixture but also improves lighting efficiency.
Cleaning frequency: Perform basic cleaning every three months, and increase the cleaning frequency after heavy rain, sandstorms, or other adverse weather conditions.
Cleaning method: Use a soft cloth dampened with a small amount of water or a neutral detergent to gently wipe the surface and lampshade of the fixture. Avoid using strong acids or alkalis, as these may damage the surface of the fixture.
Avoid scratching: During cleaning, avoid using hard objects to scratch the surface of the fixture to prevent scratches or affecting its light transmission.
(2) Check Wires and Connectors
Because LED outdoor wall lights are exposed to the outdoor environment for a long time, the wires and connectors may become damp or show signs of aging. Regularly check the connection status of the power cord, especially whether the connections are loose, oxidized, or damaged.
Check connectors: Check if the wire connectors are properly sealed and if the waterproof sealant is intact. If corrosion, looseness, or dampness is found, replace the connector or reseal it promptly.
Replace wires: If the power cord is damaged or aged, immediately replace it with a new one to ensure electrical safety.

(3) Maintain the Waterproofing of the Fixture
Although most LED outdoor wall lights have strong waterproof performance, the waterproofing may decrease over time. Check the sealing and seams of the fixture, especially in rainy seasons or areas with high humidity.
Check sealing strips: Regularly check if the sealing strips of the fixture are aging or falling off, and replace them if necessary.
Regular waterproof coating: For LED outdoor wall lights that are not completely waterproof, consider using a waterproof coating to protect the fixture.
(4) Check Bulbs and Circuits
Although LED bulbs have a long lifespan, the light output may decrease or the bulbs may malfunction after prolonged use. Regularly check that the light bulbs are working properly, ensuring their brightness and functionality.
Check the light output: If the light becomes dim or uneven, the bulb may be faulty and needs to be replaced promptly.
Check the circuit: If the light fixture flickers frequently or does not light up, there may be a problem with the circuit. In this case, it is recommended to contact a professional repair technician for inspection and repair.
(5) Avoid high-temperature environments
LED outdoor wall lights are usually designed to withstand high temperatures, but prolonged exposure to high-temperature environments (such as direct sunlight) may cause the internal components of the light fixture to overheat and shorten its lifespan. Try to avoid installing the light fixture in direct sunlight, and choose a shady or semi-shady area for installation.
