 English
Content
1. Pre-Installation Planning and Preparation
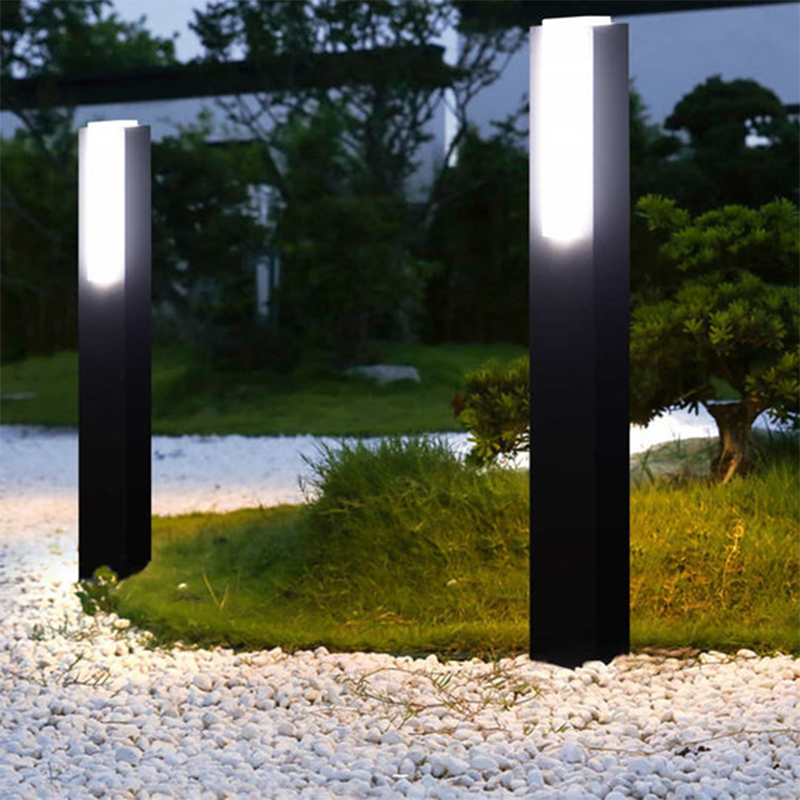
Determine the installation location and layout of your outdoor waterproof path lights: Based on the area you need to illuminate (such as a garden path, courtyard walkway, or lawn edge), plan the specific installation locations and spacing of your path lights. Consider using a ground-mounted installation to project light upward or forward from a low position to highlight details below the illuminated object or provide even ground illumination.
Inspect the lights and accessories: After unpacking, carefully inspect the path lights for damage, ensure the waterproof seals are intact, and check all accessories (such as screws and bases).
Gather the necessary tools: You will typically need tools such as screwdrivers, wrenches, and electric drills, as well as cable cutters, waterproof tape, and a level.
2. Key Points During Installation
During the actual installation, the following details are crucial to the stability, safety, and long-term performance of the lights.
Safety First: Power Off: Before making any electrical connections or installation work, ensure that the power supply is completely disconnected, wear insulating gloves, and avoid working in rainy or humid conditions. Securely install the fixture:
For ground-mounted path lights, ensure they are inserted deep enough into the ground to ensure stability.
For fixed installations, pre-installed hardware or drilled holes may be required to ensure the fixture is securely installed.
Proper electrical connections:
Cable laying: If cables are required, they should generally be buried at a certain depth (e.g., 0.3-0.5 meters) to prevent damage from vehicles or human damage.
Proper wiring: Strictly follow the product instructions, ensuring the proper separation of live, neutral, and ground wires. Connections should be properly sealed with a waterproof junction box or waterproof tape (such as self-adhesive waterproof tape) to prevent moisture intrusion.
Ensure proper waterproofing: During installation, ensure the lampshade or lamp holder is properly sealed, as this is crucial for water and dust protection. Rubber or silicone rubber pads can be used to enhance the seal.
3. Post-installation Inspection and Maintenance
Comprehensive Inspection: After installation, check that all screws and connections are tight. Turn on the power to test whether the fixture is functioning properly. Regular Cleaning: Wipe dust, dirt, and accumulated water from the lampshade regularly to maintain good light transmittance and aesthetic appeal. Always turn off the power before cleaning.
Check the seal: Regularly inspect the waterproof seal for aging or cracking, and replace it promptly. Also, check that the waterproof seals at the wiring connections are still effective.
Pay attention to heat dissipation: Path lights, especially LED lights, operate at high temperatures over extended periods. Although path lights generally lack power, ensure they are free of weeds and other debris to facilitate heat dissipation.
Winter Protection: In cold regions, if path lights are not suitable for winter use or the ground is likely to freeze, consider storing ground-mounted path lights before winter arrives to prevent damage from frozen soil.
4. Special Note: Solar Path Lights
If you are choosing solar path lights, in addition to the above precautions, you should also pay special attention to the following:
Sunny Location: The solar panel should be installed in an unobstructed location with full sunlight throughout the day.
Adjust the angle: Adjust the solar panel's tilt angle based on your location's latitude (generally between 30° and 60°) to efficiently collect solar energy. Cleaning the panels: Regularly wipe away dust, leaves, or bird droppings from the surface of the solar panels to maintain their energy collection efficiency.
When installing outdoor waterproof path lights, careful planning, meticulous installation, and regular maintenance are key to ensuring long-term stable operation and optimal performance. We hope this information helps you better complete your installation.
